PVC Ceiling Installation: A Simple Guide
PVC ceilings are an excellent alternative to conventional ceilings, thanks to its durability, low-maintenance, and moisture-resistant properties. Moreover, it's a budget-friendly option that offers ample design versatility. If you're interested in installing PVC ceiling panels on your own, this guide will provide you with step-by-step instructions on how to do it.
Materials Needed
- PVC Ceiling Panels
- PVC Ceiling Starter Strip
- Scissors or a Saw
- Measuring Tape
- Level
- Construction Adhesive
- Nails
- Screws
- Lubricant
- Drill
- Hammer
Preparation
Before you start installing PVC panels, make sure that you have all the necessary tools and materials. PVC panels come in a variety of shapes, sizes, and colors, so it's essential to choose the right one for your ceiling. Measure the length and width of your ceiling to determine the required number of panels.
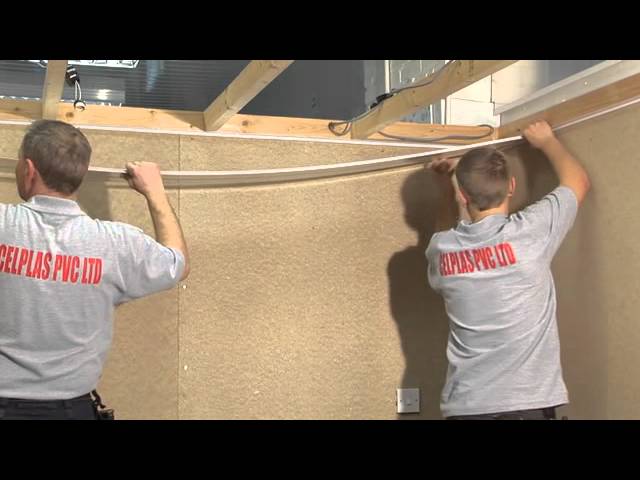
Step 1: Install the Starter Strip
The starter strip is what you'll attach to the ceiling to keep your PVC panels in place. You can either glue or screw the starter strip to the ceiling.
Things to keep in mind:
- Make sure that the starter strip is level
- Apply the construction adhesive to avoid gaps or lifting over time.
Step 2: Cut PVC Panels
Measure the lengths of the ceiling and cut the PVC panels to fit. You can use either scissors or a saw for the job, but a saw is more effective for cutting PVC panels.
Things to keep in mind:
- Use lubricant while sawing PVC panels to avoid heat build-up and harsh cuts.
- Cut the panels a little smaller than the actual measurement to allow room for expansion and contraction.
Step 3: Install the PVC Panels
Once you have cut the panels to the right size, start installing them by inserting the tongue side of the panel into the starter strip.
Things to keep in mind:
- Place the panels perpendicular to the joists.
- Make sure the flanges on the sides are lined up with each other.
- Nail or screw the panels on the tongue side to secure them in place.
Step 4: Fitting the Last Panel
When cutting your final panel, you may need to remove the nailing or screwing flange. After that, attach the panel to the wall by applying construction adhesive and then nailing or screwing it in place.
Things to keep in mind:
- Use a utility knife to trim the edges of the last panel to fit perfectly.
- The panel should not bow in the middle after installation.
Step 5: Finishing Touches
After installing the PVC ceiling panels, remove any scratches or marks from the surface. Wipe down the panels with a damp cloth to remove any sawdust or dust residue.
Things to keep in mind:
- If you are going to paint the panels, let them sit for a few days to ensure there is no moisture left.
- Use a nail punch to sink nail heads below the surface of the panel.
- Finish the panels' edges with moldings or ceiling trims of your choice.
Conclusion
Installing a PVC ceiling is an easy process that requires minimal effort and time. By following these simple steps, you can enjoy a beautiful, low-maintenance ceiling that is sure to last a long time. With PVC ceiling panels, you can transform any room in your home into a comfortable and functional living space.