Electricity is an essential part of modern life. From the lights that illuminate our homes, to the appliances that help us cook and clean, we rely on electricity to power many of the things we use every day. Understanding how electricity works and how to create an electric circuit is an important skill that everyone should learn.
Creating an electric circuit may sound complicated, but it really is not. You only need a few basic components, including a battery, wires, and a light bulb or motor. In this article, we will go over the steps to create a simple electric circuit that can be done by a Class 6 student.
Step 1: Gather Materials
To create an electric circuit, you will need to gather some materials. Here is a list of everything you will need:
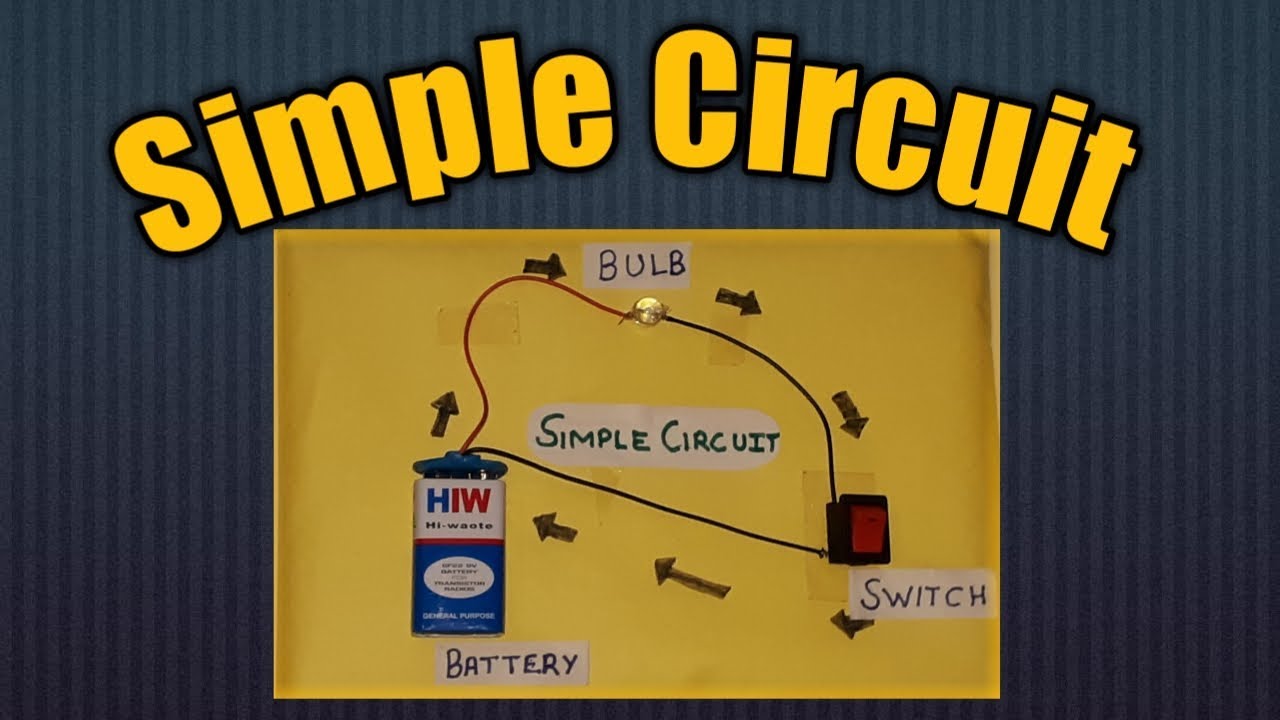
- Battery (preferably 9V)
- Wires (preferably red and black)
- Light bulb or motor
- Battery holder
- Switch (optional)
Ensure that you have all of these materials available before starting the circuit building process.
Step 2: Connect the Battery Holder
The battery holder is used to hold the battery in place and provide an easy way to connect the battery to the circuit. Start by connecting a red wire to the positive terminal of the battery holder and a black wire to the negative terminal. The red wire should be connected to the terminal that is marked with a plus sign (+), while the black wire should be connected to the terminal marked with a minus sign (-).
Step 3: Connect the Light Bulb or Motor
Next, connect one end of a wire to the positive terminal of the battery holder. Connect the other end of the wire to one of the terminals on the light bulb or motor. If you are using a light bulb, it should have two terminals, one for the positive and one for the negative. If you are using a motor, it may have three terminals, one positive, one negative, and one ground.
Connect another wire to the negative terminal of the battery holder. Connect the other end of this wire to the negative terminal of the light bulb or motor. If you are using a motor with a ground terminal, connect this wire to the ground terminal.
Step 4: Add a Switch (Optional)
If you want to be able to turn the circuit on and off, you can add a switch. Connect one end of a wire to the negative terminal of the battery holder. Connect the other end of the wire to one of the terminals on the switch. Connect another wire to the other terminal on the switch. Connect the other end of this wire to the negative terminal of the light bulb or motor.
Step 5: Test the Circuit
With all of the components connected, test the circuit by turning on the switch (if you added one). The light bulb or motor should turn on if everything is connected properly.
Conclusion
Creating an electric circuit is a simple process that can be done with a few basic components. By following these steps, you can create your own electric circuit and learn the basics of how electricity works. Remember to always be careful when working with electricity and to ask an adult for help if you are unsure about anything.