As a DIY enthusiast or an electrician, it is essential to understand how to wire a DB board. A DB board, which stands for Distribution Board, is a central component in your home's electrical system. It routes electricity from your main power supply to various circuits and appliances in your home.
Tools and Materials Required
Before you begin wiring a DB board, make sure you have the following tools and materials:
- DB board
- MCB's (miniature circuit breakers)
- RCD (residual current device)
- Cabling (varying sizes depending on the connection requirements)
- Cable cutter / stripper
- Flathead screwdriver
- Phillips head screwdriver
- Clamp meter (to test if the current is flowing through the circuit)
- Insulation tape
Steps to Wire a DB Board
Step 1: Turn Off Power Supply
Before starting any electrical work, turn off the main power supply to your home or the area where you will be working. This will prevent accidental electrocution.
Step 2: Determine the Type of Circuit
The wiring for the DB board will differ based on whether it will be connected to a radial circuit or a ring circuit. A radial circuit is a circuit that has a single cable running from the DB board to a single appliance or socket. A ring circuit is a circuit that has a single cable running from the DB board to multiple sockets and appliances in a loop.
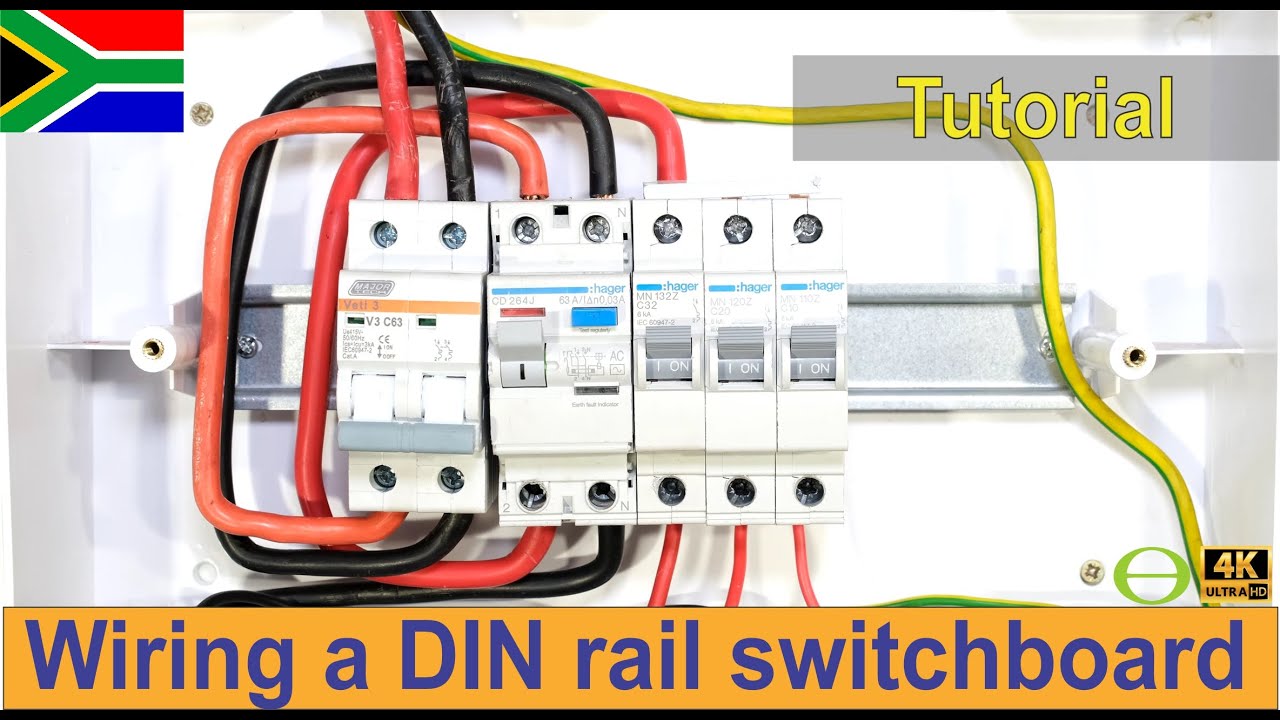
Step 3: Connect the RCD and MCBs
Connect the RCD and MCBs to the DB board based on your circuit type. The RCD is typically connected to the top of the DB board while the MCBs will be connected to the bottom.
Step 4: Connect Power to the RCD
Connect the power to the RCD using an appropriately sized cable, ensuring that the cable is properly stripped and connected to the RCD's terminals. Double check that the wiring has been connected correctly, and the RCD is secured in place.
Step 5: Connect the Neutral Wire
Connect the neutral wire to the neutral bar, which is typically located at the top of the DB board. This will carry any unbalanced current back to the power supply.
Step 6: Wire the MCBs
Wire the MCBs to the DB board based on your circuit type. For radial circuits, you will need one MCB per circuit. For ring circuits, you will require one MCB per circuit for the entire loop. Keep in mind that the MCB size must match the cable size that you are using for the circuit.
Step 7: Connect the Live Wires
After wiring the MCBs, connect the live wires to the MCBs. Ensure that the live wire is properly stripped and connected to the MCB's terminals, and that the connection is secure. Remember to label each circuit for easy identification and maintenance.
Step 8: Test the DB Board
Now that you have wired your DB board, it's time to test it. Use a clamp meter to measure the current flowing through each circuit. If the test returns normal results, you have successfully wired a DB board!
Conclusion
Knowing how to wire a DB board is essential if you are working on new construction projects or making repairs or modifications to your home's electrical system. It's important to always prioritize safety and double-check your work to avoid any accidents or damage to your home's electrical system. Once you have completed the process, your DB board will work as a safe and well-functioning hub for all your electrical needs.